Legacy filters have now been deprecated for all new stores. You should refer to this article to see how to set up filters on Nyla.
If your store uses legacy filters then the functionality will continue to be supported until you switch to the latest filter version.
We recommend updating to the latest version of filters given that the newer version of filters is:
- More performant: The updated approach to filters is faster for end users/shoppers on the site to retrieve their results
- Easier to manage: new filters are added using Shopify search and discovery app or via metafields. Given that filters are now added via properties, they can be set to show dynamically.
- Automate not showing empty filters on PLP pages: Previously, to hide filters on a PLP you needed to set an override to manually show/hide whether or not filters appeared. This can now be managed dynamically using properties and layouts or conditional visibility.
- More filtering options: The updated filtering offers options such as filtering for in/out of stock
- More sort options: There are now additional options to sort collections
Intro: (What is this feature and what does it do?)
Filters on Nyla allow you to enable Filtering of different Sources within Nyla, for example Filtering Products within a Source Collection, or Filtering Reviews by the Review rating within your reviews widget.
You can filter by
- Filtering by Tag means that your filters are applied based on tags that you must add to your products in Shopify. See below for details on how to do this.
- Filtering by Product Option applies filters based on the Product Options of the products in your source collection.
- Filtering by Property enables you to filter by a Property with your source. Not all Properties are eligible for Filtering.
Filterable Sources include:
- Source: Collection
- Reviews Sources (filter by Properties)
There are three Filtering related content items on Nyla.
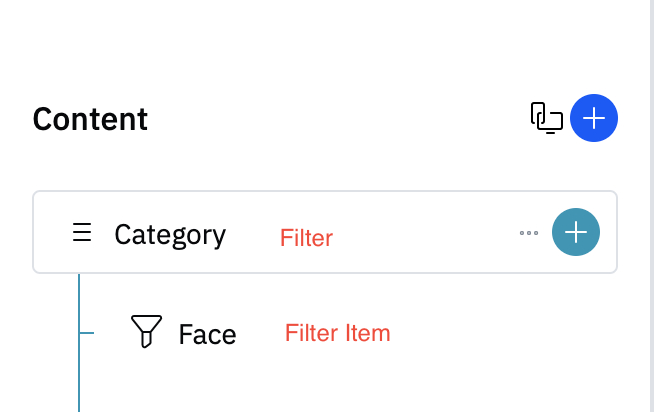
Filter Content Item: the Parent Content Item you use to define the “Category” of Filter that your customers can choose within as well as setting Filtering settings.
2x types of Filter Item (Manual Filter Item and Filter Item): These are Child Content Items that represent the options available to your customers to choose to filter by within the Filter. There are 2 types of Filter Items, Filter Item, which is used for standard Display options, and Manual Filter Item which contains a content block and is used to set fully manual display options.
For an example of how these content items work together, a Filter of Color might have Filter Items “Yellow” and “Red”. Likewise a Filter of Material might have Filter Items “Nylon” and “Wool”. You can only add Filter Items under a Filter.
Filter Settings:
Allow Multiple Selections: This allows your customers to apply more than one Filter Item within your Filter.
Apply Filter on Selection: Means your filter is automatically applied as the user makes a selection without needing to confirm by clicking a CTA.
Hide Filters with 0 Results: If a filter returns 0 results, it should be hidden
Move Selected Filter First: Setting this to on moves your customers’ most recently selected filter first in the list of filters.
Filter Type: You can choose AND or OR as your Filter type. Choosing AND means that your results have to be present in both filters within the category you have chosen. Choosing OR means that your products will show if they match any of the Filters the customer has chosen in that category.
- Display: Allows you to choose the style for your Filters. You can choose from:
- Checkbox Style: Use a Design token Checkbox in order to display your filters.
- Product Option Style: Display filters using product options styles.
- Manual: Manually create Filter Items using content items.
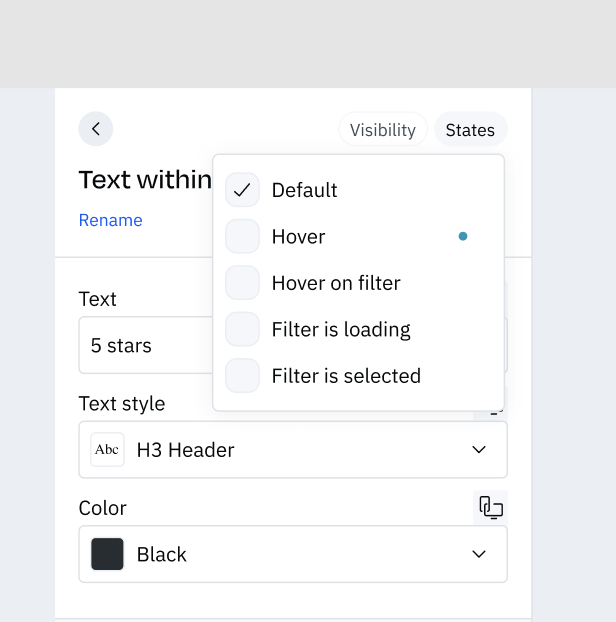
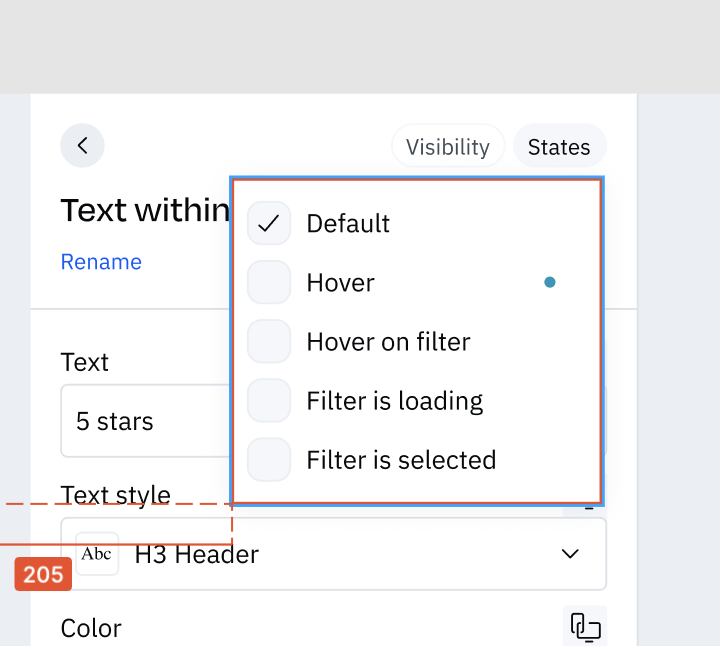
States: Filter Item and Manual Filter Item (as well as any children of the Manual Filter Item) have states of Hover, Hover on Filter, Filter is Loading, Filter is Selected so that you can style your manual Filters based on those states.
Filters: Common Use Cases:
- Filtering Products on Product Listing Pages
- Commonly used with Sort
Using Filters: (How do you use this feature?)
See video explanation here: https://www.loom.com/share/f202f2abbf5c4920bf5eaacd4c9c06b3
Step 1: Add your Source: Filters are only available within specific Sources. Examples include Source: Collection and Source: YotPo (for filtering reviews by rating).
Step 2: Add Content Item: Filter & Configure: Add your Content Item Filter and configure it based on the Settings available in the content item (see more detail on each option above). Choose your Filter style in Display.
Step 3: Add Filter Item(s): You can then add your Filter Items as Children of your Filter. If you have selected Manual Display style, then you will need to create your Filter Items using the content block, and add a link action in order to apply the Filter.
- If you are using Shopify Tags, you should add the corresponding tag for each Filter Item
If you are adding Filter Items inside of a template that will be used across multiple Product Listing Pages, we suggest that you add all of your Filter Items for all of your products. If the Filter Item is not present within that collection, it won’t load on your site.
Step 4: (If applicable) Add your Shopify Tags: If you are using Filter by: Tags , before starting to configure your filters, you should add your tags to your products in Shopify.
You need to use this format for tags: nyla_filter_{filterGroup}_{filterValue}
Your Filter Content Item (which is the "parent" category of the "child" filter items within that) represents the {filterGroup} in the tag that you'll add to Filter Items in Nyla and to Products in Shopify.
The {filterGroup} value matches the Title entered in the Filter Content Item. If there are spaces in the title e.g "product type" then an underscore in place of the space in your tag, e.g in this case it would be: product_type.
For each Filter item (if you set your filter to filter by tags), then you should add the tag in each Filter Item that will be used to match the value in Shopify.
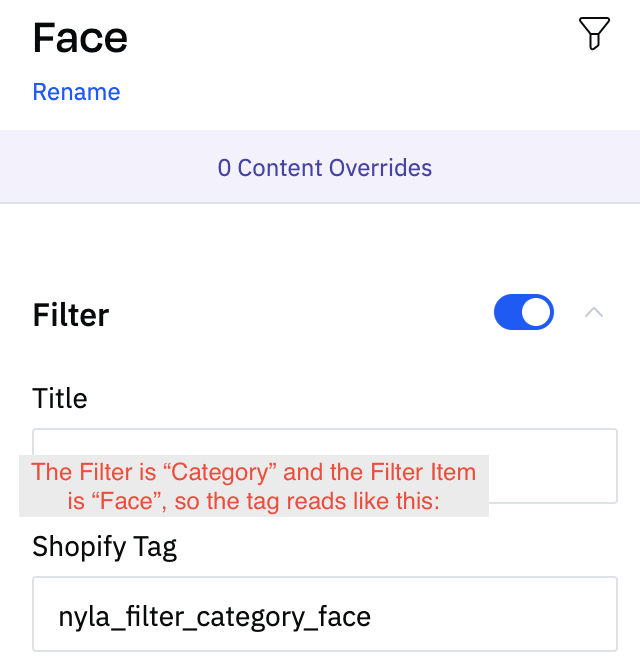
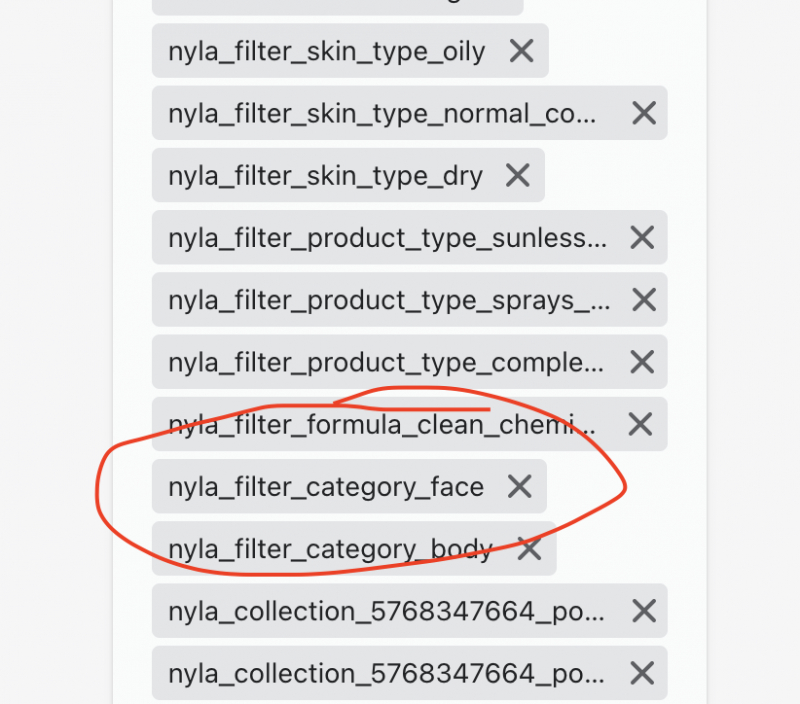
In the example below, the Filter Item "Face" is within the Filter "Category", so the Tag that is added within the Filter Item face is:
nyla_filter_category_face
Category = the filter name
Face = the term used to represent the filter item
On Nyla: Configure your Filter Content Item: Add the title for the Filter Content Item, this acts as the (filterGroup) in the tag you'll add to the product.
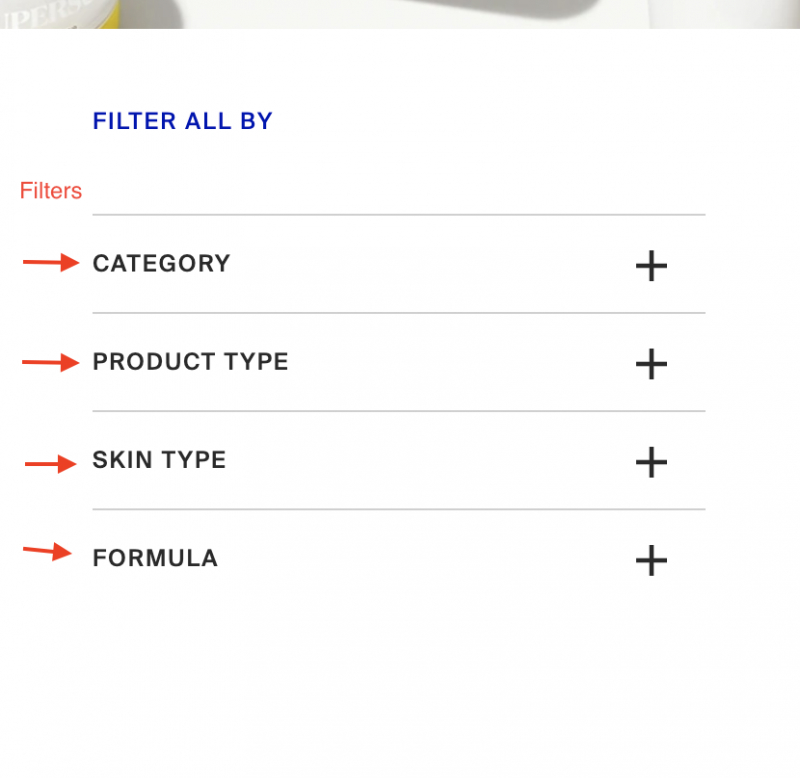
- Each Filter will act as a category like Category, Product Type, Skin Type, and so on.
- Under each Filter will be the values that the user uses to filter in that category, e.g on Supergoop the Filter Category has Filter Items like (Face, Best Sellers, Body, Men)
On Nyla, under the Filter, add your Filter items. For each Filter Item: Add the tag for Filter Item in the format (nyla_filter_{filterGroup}_{filterValue}). For example, in the case of the Filter Item "Body" within the Filter "Category" the tag would be nyla_filter_category_body
On Shopify: Add the full tag on all the products you want that filter to apply to. So in this case, if you add the tag "nyla_filter_category_body" to a product in Shopify, that product will show up on the site when a user filters for "Body" within the "Category" filter
Please note:
- When the Filter has spaces in the name, replace the space with an underscore in the tag you add to the item. Do not add spaces to the tag you use for the filter item
- Remember to rebuild your site in order for Nyla to be able to access the filters
Step 5 (If applicable): Add any CTAs: Depending on your layout or design, you might need to include CTAs that allow users to Reset or Apply the filters that your customer has chosen. To do you that you can use the following Link Actions:
RESET_FILTERS: Resets Filters chosen by your customer
APPLY_FILTERS: Applies Filters chosen by your customer
Filters: Limitations
- Filtering between categories is always an AND operator. Filtering within categories can be set as an AN or an OR operator.
Filters: Common Mistakes
- Tags: Tags need to be added in the correct format
- Not rebuilding your site after having added your tags
Filters: FAQs
- How would you choose which image goes with each Filter Item?
- How would you do more advanced Filter Item Layouts?
Filters:
Content Items:
- Filter
- Filter Item
- Manual Filter Item
States:
Filter Item and Manual Filter Item have states of Default, Hover, Hover on Filter, Filter is Loading
Link Actions:
- RESET_FILTERS: Resets Filters chosen by your customer
- APPLY_FILTERS: Applies Filters chosen by your customer